This Thanksgiving Craft for Kids post contains affiliate links.
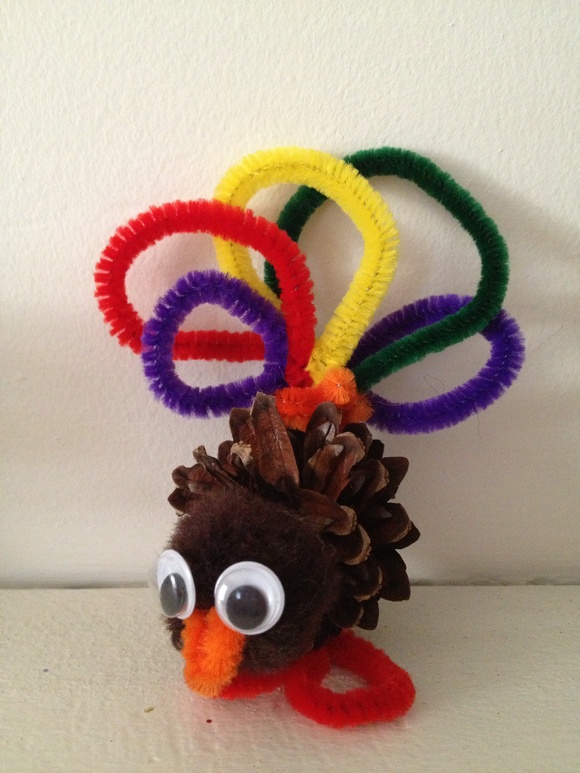
You can’t very well have Thanksgiving without turkeys gobbling about can you? Well if you don’t have room for the real thing, you can always make this fantastic kids craft version instead. This pine cone turkey Thanksgiving crafts for kids is a cinch to make and uses common materials you may already have around your home. Kids will love creating their very own little turkey to celebrate the holiday, and these can even double as place setting decorations should you have a festive lunch party. Take a look below at how to make your very own pine cone turkey.
Pine Cone Turkey Thanksgiving Craft:
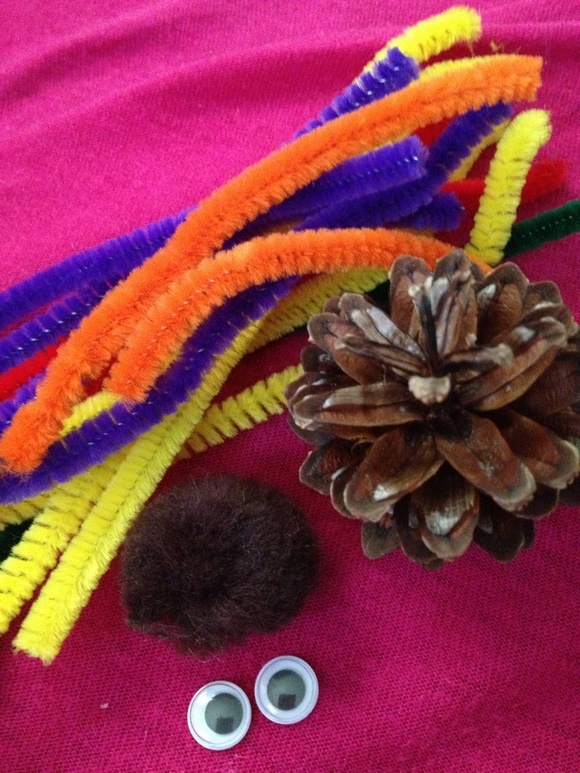
Supplies needed:
- 1 pine cone
- Assorted pipe cleaners in various colors
- Pom poms
- Google eyes
- Craft or hot glue
If you do not already have these supplies around your home, then make a quick trip to your local dollar store. We were able to find a great deal of these supplies at Dollar Tree, making this craft a frugal one that we don’t have to break the bank in order to enjoy.
Directions:
- Lay the pine cone on a flat surface so you are free to start gluing items to it. Stand it up on the flat bottom so the tapered portion of the pine cone goes upward.
- Apply a generous dab of glue on the front of the pine cone. This is where you will want to attach your pom pom. The pom pom will serve as the turkey’s head. Press the head firmly to the pine cone and do not let go until you are sure it is stuck on well.
- Add another two drops of glue to the front of the pom pom. This is where you will now attach your google eyes. Press the eyes to the pom pom firmly and again, do not let go until you are sure they have adhered well.
- Now, it is time to add the tail. Cut the pipe cleaners into shorter strips and create loops. These loops will be the individual feathers.
- Apply a generous dab of glue to the back of the pine cone and press each pipe cleaner feather to the back of it. Press firmly.
- Now your turkey needs is feet! Cut some small sections of red pipe cleaner and bend them into a loop. Glue them to the underneath of the pine cone.
- Finally, snip one last small piece of red or orange pipe cleaner and bend it into a small “v.” Add a tiny dab of glue and press the V to the face of the turkey.
There you have it! You know have a gorgeous little gobbler all ready to display in your home or at your Thanksgiving table. This is the perfect craft for tiny little fingers to manipulate and strengthen those fine motor skills. Making this craft is also the perfect chance to talk to your child about the symbolism of turkeys and the Thanksgiving season. You can also look up some fun turkey facts together.
Give this fun and frugal Thanksgiving craft a try and see how easy it is to get excited about the Thanksgiving holiday together. It is a craft your little turkeys are sure to enjoy.


This is so cute! If my daughter sees this, I’m sure she’ll ask me to make one!
Too stinkin’ cute and perfect for a day at home to make crafts and sip apple cider!
that is super cute, looks easy to make too! thanks!
Great tutorial! This is a cute craft that can be done by a lot of age groups! LOVE IT>
That’s just so adorable! Thanks for sharing at Share Your Stuff Tuesdays
Hi Katie,
I am always looking for great crafts to do with my little ones. This one seems simple and adorable enough that they can do. Thank you for sharing it on the Thumping Thursdays Blog Hop.
Sincerely,
Karina
Hi Katie,
I am always looking for great crafts to do with my little ones. This one seems simple and adorable enough that they can do. Thank you for sharing it on the Thumping Thursdays Blog Hop.
Sincerely,
Karina
This is cute, and looks easy enough for my preschooler. Awesome! Pinning to Pinterest, thanks for sharing.
I am loving this project!!! Gives me a great alternative to what I had planned for our turkey craft next week! I think the littles will have an easier time with the pipe cleaners than feathers! Thanks!
I would love it if you joined us this week for our linkup party!
http://www.sowderingabout.com/2013/11/awesome-things-tuesday-and-giveaway.html
So cute! I think my grandsons would love to make these!!
G’dayHow cute! All blog comments appreciated and sharing is caring today!
Cheers! Joanne @ What’s On The List #SayGdayParty pinned
This is so cute!! My daughter will love this- she’s having a friend sleepover tonight so maybe we’ll make this together! I’m hosting a link party that starts at 8 pm – it’s called Found & Foraged at http://www.averystreetdesign.com. I’d love to see you! xo, Laura
This is such a fun craft, so cute! My youngest would love making this. Thanks so much for sharing at Inspire Me Wednesday. Featuring you in this week’s issue.
Cute Turkey! I love simple, yet adorable!
Simple, yet adorable…love that!
This pine cone turkey looks fallish and whimsical-both things I llike. Thank you for sharing.