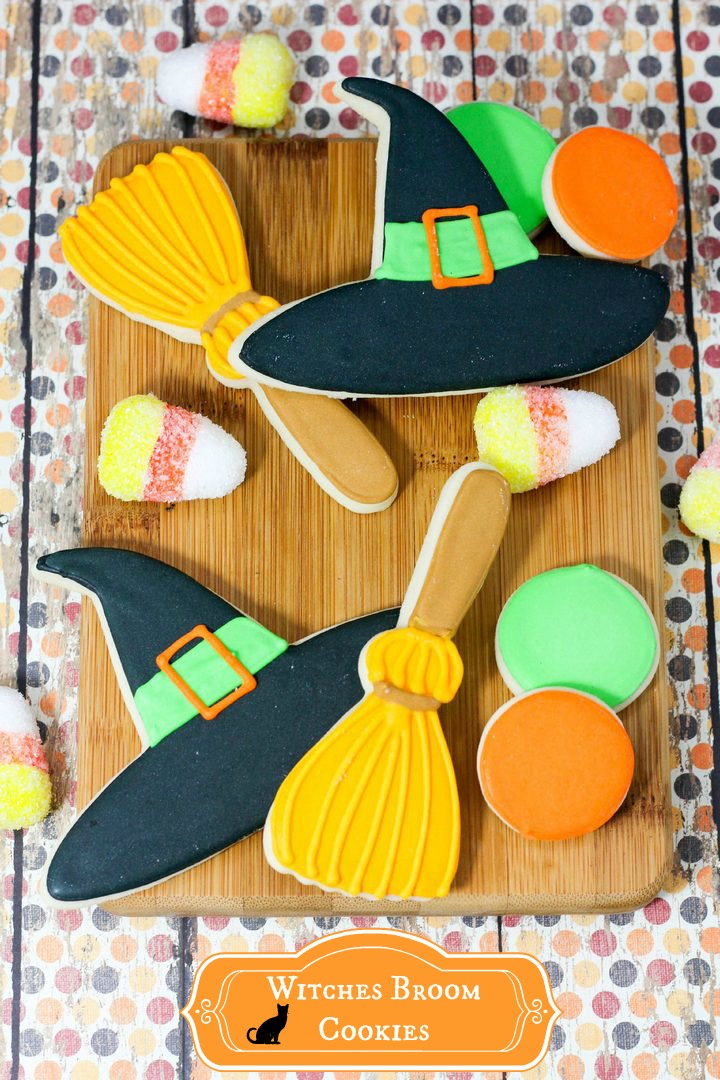
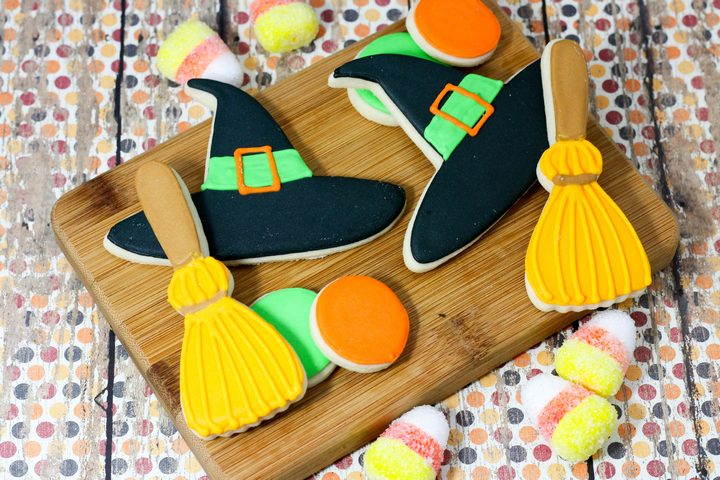
Looking for a fun Halloween cookie recipe that you can make with your BFF? These Witches’ Broom cookies are so adorbs! Plus the little hats? OMG! Perfection! They look totally professional too, don’t they? When you’re done, you’ll be saying to yourself “self, you could totes be a pro cookie maker!” So let’s check out this fun Halloween cookie recipe together, shall we? These so so perfect-o for all your Halloween parties!
Related: Pumpkin Halloween Muffins with Oreo Topping
Halloween Cookie Recipe: Witches Hat & Brooms Cookies
*Affiliate links included below
Cookie Recipe:
Cookie Ingredients:
- 5 C flour
- 2 tsp baking powder
- 1 tsp salt
- 1 1/2 C soft unsalted butter
- 2 C granulated sugar
- 4 eggs
Cookie Cutter:
Cookie Directions:
- Cream the soft butter with the sugar until the combination is smooth not grainy to the touch in a mixing bowl.
- Add all 4 eggs at one time.Continue to mix.
- Add the vanilla.. Continue mixing.
- Sift the four, baking powder, and salt together.
- Add the dry mixture to the wet mixture.
- Continue mixing to make sure all ingredients are thoroughly blended.
- Make the dough into a ball, wrap it in cling wrap completely covering the entire dough ball.
- Put in the refrigerator for about 6 hours or overnight. Check to see if the dough is firm.
- Preheat oven to 325 degrees.
- Pull the cookie dough out of the refrigerator and sit it out to soften up a bit.
- Put flour out on the wood cutting board, rub flour on the rolling pin, and work some flour into the batter.
- Roll the dough out on the cutting board and using your cookie cutter begin to make your cookies.
- Line the cookie sheet with parchment paper.
- Using a metal spatula move the cut cookie to the parchment lined cookie sheet.
- Bake at 325 degrees for 8 minutes. Check to see if the cookie are thoroughly baked.
- Take the cookies off of the cookie sheet and put on a wire rack to cool completely. (About 10 minutes).
Royal Icing
Icing Ingredients:
- 2 egg whites
- 1 C powder sugar
- 1/2 tsp cream of tartar
- Black, green, tan, golden yellow & orange gel food coloring (you can grab the Wilton Halloween colors and call it a day!)
(For these cookies you may have to make three bowls of icing). (One bowl of icing will be divided into thirds, 1/3 will be dyed black for use for the icing of the witches hat and the other two for the broom (1/3 icing) tan for the broom stick and golden yellow(1/3 icing) for the bristles of the broom.)
Icing Directions:
- Combine all ingredients in a mixing bowl mixing on medium speed for 4 minutes. (except your food coloring)
- If icing is not stiff enough add 1/4 C powder sugar.
- Take out 2 bowls, put 1/2 of icing in the first bowl, add green gel food coloring mixing well. In the second bowl add several drops of orange gel food coloring mixing well to blend the color.
- Spoon each of the icings (black, tan, golden yellow, tan, orange, and green.) into individual frosting bags with a #5 tips. Twist the open end of the
bag to push the icing to the tip.
Witches Hat
- First step for each of the Witches Hat cookies is to outline it in black.
- Allow the witches hat outline at least 30 seconds to dry before filling the body of the cookie in with the thinner black icing*. ( After outlining all of the witches hat cookies you can push the remaining icing into a bowl and add the 1 tsp of water and mix well to get the right consistency.) Using a butter knife to spread it from the outlined part inwards to the center.
- Allow this to dry for several minutes before adding the hat band and hat buckle.
- Start with the hat band by outlining it in green and then filling it in.
- Allow the band to dry for several minutes before starting the hat buckle.
- The hat buckle is a single line in a square in orange on top of the hat band.
- Allow to dry for 5-10 hours.
Broom
- Outline the bottom half of the broom in the tan, filling it in with the thinner tan colored icing, Allow to dry for several minutes before starting on the bristles of the broom.
- Outline the bristles of the broom in the golden yellow, filling it in with the thinner golden yellow colored icing. Allow to dry for several minutes before adding the bristle lines.
- Allow to totally dry for 5-10 hours.
Okay, so yes, they do take a little work to get done, but most of it’s in the drying!
Who would you make these Halloween cookies for? Are you planning any fun parties this season? Talk to us in the comments!


What a fun halloween snack. I love how they came out.
Wow these look so professionally done! I love the idea and I know my daughter could do it, I on the other hand, probably not lol ,she is the baker in the family, I love to cook. I will share this with her she has been wanting some new ideas for Halloween baking! Thanks!
What an adorable Halloween treat! Mine would not be nearly as cute as your but we may give them a whirl anyway.
These cookies are perfect for Halloween and they are iced to perfection
These are adorable! My kids will love making these 🙂
You guys are super talented….this is just fabulous
They are stunning. I wouldn’t want to eat them! I’m not having any parties so if I made them, I’d end up eating them.
These are too cute! I don’t think my icing would look nearly as nice as yours though!
How cute!! These would make a great classroom treat
These are amazing to look at I bet they taste delicious too
You did a fantastic job on these.They look really sweet! Nice treat.
They came out so cute and festive. I’m not sure mine would come out quite so neatly, but I’ll try.
These cookies would be a huge hit at my daughter’s preschool! I think we’ll make a few batches to share before Halloween!
My granddaughter is too young to really understand any of this but she sure understands food! 🙂 Will share with her mother.
The brooms are cute. My little ones will enjoy eating these.
These are really cool! I love that they are decorated perfectly. Looks yummy too!
They look so perfect!!! I have to try these! And I would eat them on a daily basis hahahaha
These are adorable! Thanks for linking up to Merry Monday! Pinned! Have a great week!
Kim
Wow, I would definitely buy these! They look professional. Amazing job, thanks for sharing your creation at the #HomeMattersParty this week.